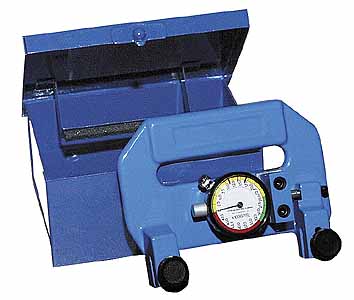
LENOX - Bandsaw Blade Tension Meter
Purchase
Description
Procedures for measuring band tension on vertical or horizontal cutting machines.
CAUTION -- BE SURE THE POWER TO THE MACHINE IS TURNED OFF
Step 1. For use on a Vertical Saw with the blade stopped and slack (just enough tension to hold the blade on the wheels) clip a spring clamp on the blade at table level. This is to prevent the blade from moving down due to the weight of the tension meter. (Note: This steps is necessary when used on a horizontal saw.)
Step 2. Attach the fixed arm of the tension meter on the blade leaving a 1/8" gap between the back of the blade and the top of the slot. Stretch the moveable arm of the gauge slightly so the needle on the dial indicator moves two or three numbers on the scale. This will remove any free play in the mechanism. Tighten the thumb screw (it only needs to be finger tight)
Step 3. "Tap" the blade gently to normalize the slack. Loosen the small knurled lock screw which holds the indicator dial in place and "zero" the dial. Lock the dial in position
Step 4. Apply band tension until the tension meter reading is correct for the type of blade being used as shown on the chart. Gently "tap" the blade again to see if there are any fluctuations in the dial reading. Increase or decrease the tension, if high or low to obtain the correct dial reading.
MAINTENANCE
It is important that the spindle of the dial indicator never be oiled or greased. The spindle is closely fit to its bearings and any lubrication applied will cause dirt to collect resulting in the spindle sticking and give a false reading. If the spindle sticks, it can be cleaned by wiping the exposed surface of the lower end.
While the dial indicator is ruggedly constructed, it should be remembered that it is a precision instrument and should be handled carefully if it is to retain its accuracy and continue to give trouble free service.


 Have a question?


